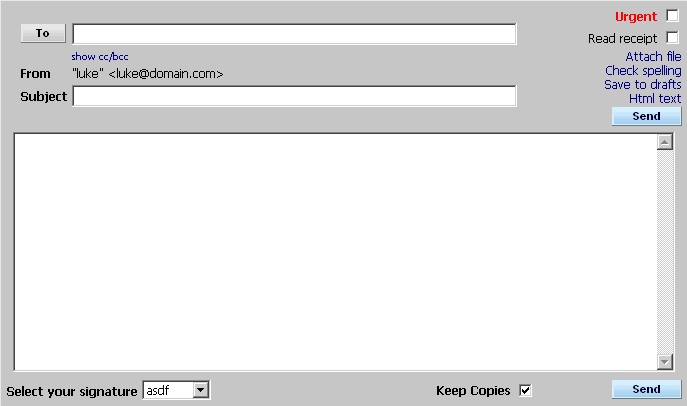
| Sending a new message | ||
|
|||
| Address book | ||
|
Instead of manually typing email addresseses, you can select them from your Address Book or
Recent Addresses.
Click 'To' and choose which addresses you would like to send the e-mail to. 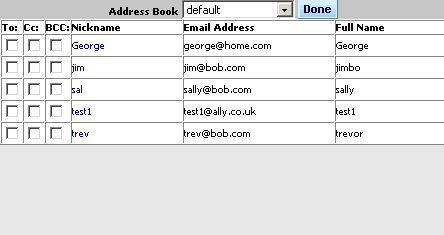 Select email addresses and tick To, CC or BCC for each depending on which fields the address should appear in. Then press done. Alternatively, you can click on the nickname. |
| Spelling | ||
Once you have written your email, you can
check your spelling
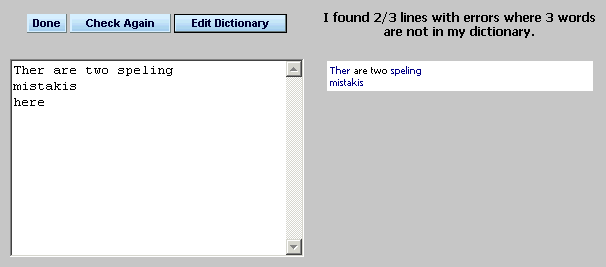 The left panel shows the message body. The right panel shows the message body text with the misspelled words as links. To correct the words that have been misspelled, just click on them in the right panel. This will take you to the 'Correct Word' screen to select one of the possible suggestions presented to you or change it manually. If the word is not misspelled and is not in the WebMail dictionary, click on the Add button to add it to your personal dictionary. |
| Attaching files | ||
To attach files to your message click 'Attach file'.
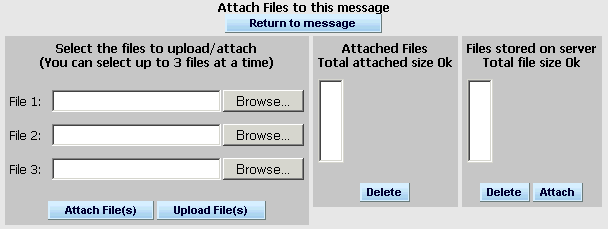 Click on the Browse button to select the file that you would like to attach then click 'Attach file(s)' to attach the file to the message. When the file is successfully attached, it will appear in the Current Attachments list. The size of the file will also be indicated in brackets beside the filename. You can attach more than one file to the message. As more files are selected. To store a file on the server (to save you uploading each time you send it), click on 'Upload files'. If you want to attach a file Stored on Server in your current message, select file from the 'Stored on Server' list, click Attach. Stored files will remain on Server until you delete them. To remove an attached or stored file, select the file and click Delete. Once you have finished attaching all of your files, click on 'Return to message'. |
| Html Text | ||
The Html text editor lets you easily add formatting to your message. You can add color, use
different fonts, make tables, insert links, align text, and more.
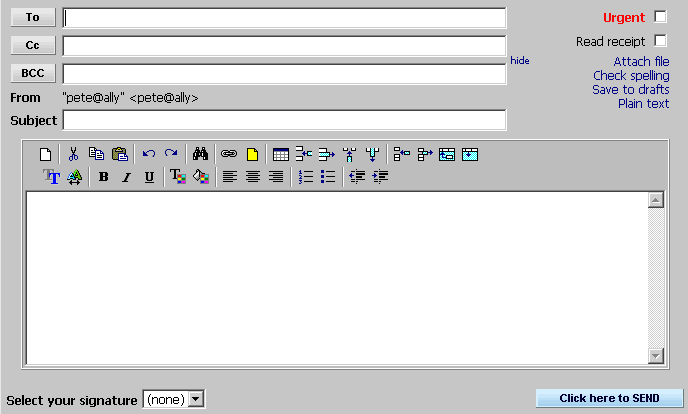 Click on Plain text to return to the simple email screen. |